
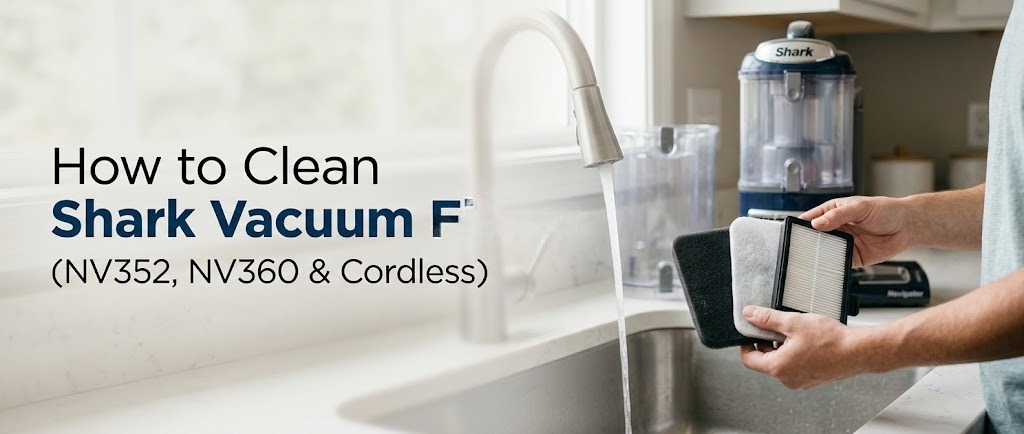
Cleaning Shark vacuum filters regularly helps maintain suction, reduce airflow restrictions, and prevent dust and debris from accumulating inside the vacuum. The process is straightforward: remove loose dust, rinse only washable filters with water, let them dry completely, and reinstall them in the correct order.
The cleaning schedule depends on your model. For the Shark Navigator NV352 and NV360, clean the pre-motor foam and felt filters every three months under normal use. Clean the post-motor HEPA filter every two years or as needed. For the Shark Stratos Cordless IZ400, clean the pre-motor filters at least monthly and the post-motor filter at least once a year.
How Often Should You Clean Shark Vacuum Filters?
Use the maintenance schedule for your specific Shark model. The following examples cover two common Navigator uprights and the Stratos Cordless IZ400.
| Shark vacuum model | Pre-motor foam and felt filters | Post-motor HEPA filter | Drying time |
|---|---|---|---|
| Shark Navigator NV352 | Every 3 months | Every 2 years or as needed | At least 24 hours |
| Shark Navigator NV360 | Every 3 months | Every 2 years or as needed | At least 24 hours |
| Shark Stratos Cordless IZ400 | At least once a month | At least once a year | Up to 48 hours |
These intervals reflect the maintenance guidance for the models listed. If you vacuum frequently, clean up pet hair, or notice reduced suction, inspect the filters sooner.
Cleaning is not the same as replacing. Washable filters can be cleaned and reused when they remain in good condition. Replace a filter if it is damaged or if the manufacturer’s instructions say it has reached the end of its service life.
What You Need Before Cleaning
Prepare a few basic items before you start:
- Clean running water: Use cool or lukewarm water as specified in your model’s instructions.
- A trash can: Tap out loose dust before rinsing the filters.
- Clean, dry paper towels: Useful for blotting excess moisture from felt without rubbing it.
- A well-ventilated drying area: Give the filters enough space and time to dry naturally.
Avoid dish soap, laundry detergent, bleach, disinfectants, and other cleaning products unless Shark explicitly approves them for your model. Do not put filters in a washing machine, dishwasher, clothes dryer, or microwave.
I stick with water because cleaning products can leave residue behind. A filter may look clean after rinsing but still feel slightly slick if a film remains on the material. That residue can hold onto fine dust, including powdery drywall dust, rather than letting it rinse away cleanly. The safest approach is to follow the manufacturer’s instructions and avoid adding anything the filter was not designed to handle.
Step-by-Step: How to Clean Shark Vacuum Filters
Step 1: Turn Off the Vacuum and Remove the Filters
Switch off the vacuum and unplug it from the wall outlet. If you are cleaning a cordless model with a removable battery, remove the battery according to the manufacturer’s instructions.
Empty the dust cup before opening the filter compartment. This keeps loose dirt from falling back into the vacuum while you remove the filters.
On Shark Navigator upright models such as the NV352, the pre-motor foam and felt filters sit beneath the dust cup. The post-motor HEPA filter is housed separately in the vacuum body.
Filter locations and removal procedures vary by model, so use the correct owner’s guide if your vacuum has a different layout.
Practical tip: I empty the dust cup before pulling out the filters because a cup full of fine dust can spill straight back into the filter compartment. When removing a filter, I handle it by its edges and lift it out slowly rather than shaking it over the vacuum. That keeps loose debris from spreading into areas I have already cleaned.
Step 2: Tap Out Loose Dust
Before adding water, hold the filters over a trash can and gently tap them to remove loose dust. Handle the edges carefully rather than striking the filter against a hard surface.
Removing loose debris first makes rinsing easier. If you wet a filter covered in heavy, dry dust, the dirt can turn into a paste that is harder to flush out.
For HEPA filters, follow the cleaning method specified for your model. The Shark Navigator NV352 guide, for example, instructs users to tap loose dust out with the dirty side facing down before rinsing.
What I look for: A noticeable fall of loose dust into the trash can tells me that some debris can be removed without water. I keep the tapping gentle. Hitting the filter against a bin or countertop may seem like a faster way to knock the dust out, but it risks damaging the filter material.
Step 3: Wash the Foam and Felt Filters
Only rinse filters identified as washable in your model’s instructions. For washable pre-motor foam and felt filters, use water only.
Cleaning the foam filter
Hold the foam under gentle running water and press it lightly between your palms. Repeat until the dirty water runs clear, where that instruction applies to your model.
As water leaves the foam, it may feel heavier and more saturated than it looks. I press it gently several times to help release trapped dirt, but I do not twist or wring it like a towel. Aggressive squeezing can deform the foam and make it harder to seat correctly in the filter housing.
Pay attention to how the foam feels. When the filter is saturated, it feels noticeably heavier and softer under your fingers. As I press it gently, water escapes through the pores and the foam gradually releases trapped dirt. I use light, repeated pressure instead of crushing it flat. The goal is to flush out contamination while allowing the foam to retain its original shape.
I also check the water running off the filter. If it remains visibly dirty, I continue rinsing as directed by the model’s instructions. I do not judge cleanliness by appearance alone because foam can remain discolored even after loose dirt has been removed.
Cleaning the felt filter
Felt needs gentler handling because its thin material can stretch, fuzz, or fray under friction. Hold it flat under running water and use light fingertip pressure to loosen dirt.
To remove excess water, place the felt between clean, dry paper towels and press gently. Do not scrub the surface, pull at the edges, or twist the filter to force water out.
Rinse until the water runs clear when required by the model’s instructions. If a filter is torn, badly distorted, or deteriorating, follow the manufacturer’s guidance on replacement rather than continuing to use it.
The key difference is how much pressure I use. Foam can tolerate gentle compression, but felt needs a lighter touch. I keep the felt flat and let the water do most of the work. If I need to remove excess moisture, I press it between paper towels rather than rubbing it back and forth. That helps prevent the surface from becoming rough or the edges from stretching out of shape.
Step 4: Clean the HEPA Filter Only If It Is Washable
Not all Shark Navigator HEPA filters are washable. The cleaning method depends on the exact model and filter type. Some filters are designed to be rinsed with water, while others should only have loose dust gently tapped out. Never assume that a HEPA filter is washable simply because it fits a Shark Navigator vacuum.
Before cleaning, check the filter’s labeling and your model’s owner’s guide. If the filter is not explicitly identified as washable, do not rinse it with water unless Shark’s instructions for that exact model specifically permit washing. A filter that is designed for dry cleaning only can be damaged by improper washing.
For the Shark Navigator NV352, the owner’s guide specifies the following method:
- Confirm that the filter is washable according to the instructions for your exact model.
- If washing is permitted, hold the filter with its dirty side facing down.
- Rinse it with lukewarm tap water until the water runs clear.
- Avoid scrubbing the filter media or using brushes and cleaning chemicals.
- Allow it to air-dry for at least 24 hours before reinstalling it.
If your HEPA filter is not washable: Hold it over a trash can and gently tap out loose dust only if the manufacturer’s instructions permit this method. Do not rinse, soak, scrub, or apply cleaning products to the filter. Replace it according to the maintenance instructions if it is damaged or has reached the end of its service life.
Do not assume the same cleaning procedure applies to every Shark Navigator model or every generation of HEPA filter. When the filter label and owner’s guide are unclear, verify the instructions for your exact model before introducing water.
Step 5: Let the Filters Dry Completely
Drying is one of the most important parts of filter maintenance. A filter can feel dry on the outside while retaining moisture in its thicker center.
Place washed filters in a well-ventilated area and let them air-dry naturally. Keep them away from direct heat and do not use a hair dryer or radiator to speed up the process.
Use these model-specific drying guidelines:
- Shark Navigator NV352: Allow at least 24 hours.
- Shark Stratos Cordless IZ400: Allow the filters to dry completely; Shark’s guidance allows up to 48 hours.
Before reinstalling the foam, gently press the thickest part between your thumb and forefinger. Check for dampness or moisture transfer rather than relying only on the outer surface. If the foam still feels damp, leave it to dry longer.
Do not reinstall a filter until it is completely dry. Residual moisture can contribute to unpleasant odors and may affect the vacuum’s operation.
My practical drying check: I press the thickest part of the foam gently between my thumb and forefinger. The outside can feel dry while the center still feels cool and damp. If I detect moisture or feel water transferring to my fingers, I leave the filter to dry longer.
I never shorten the drying period just because the surface looks clean. A damp filter can become a source of musty odors, and reinstalling it too soon defeats the purpose of cleaning it. I would rather leave the vacuum unused for another day than put a wet filter back into the machine.
Step 6: Reinstall the Filters in the Correct Order
Once all washed filters are completely dry, put them back into their designated compartments.
For the Shark Navigator NV352 and NV360, follow the specified stacking order:
- Insert the felt filter first.
- Place the foam filter on top of the felt.
- Make sure the edges lie flat, without folded or pinched corners.
- Reinstall the dust cup and secure it properly.
Before closing the compartment, check for loose debris around the filter edges. A filter that is folded or incorrectly seated may not fit properly.
After reassembly, check that the dust cup and covers are secure. If you hear a high-pitched whistle when the vacuum runs, switch it off and inspect the filter seating, seals, dust cup, and accessible airflow paths. A whistle can indicate an air leak or restriction, but it does not prove that a particular seal is damaged.
What I check before closing the compartment: I run my fingers around the accessible filter edges to make sure nothing is folded or trapped underneath. The foam should sit evenly on the felt rather than bulging at one corner. I also check that the dust cup locks into place without needing unusual force.
If a filter looks slightly crooked, I take it out and reseat it instead of forcing the cover closed. A few seconds spent checking the fit can save me from having to reopen the vacuum after hearing an unfamiliar whistle.
Step 7: Check the Vacuum Before Using It Again
Once the filters are dry and correctly installed, reassemble the vacuum according to the owner’s guide.
If suction remains weak, check other parts of the airflow path:
- Full dust cup: Empty it before testing suction again.
- Blocked hose or wand: Inspect accessible sections for trapped debris.
- Clogged inlet or floor nozzle: Check for hair, lint, and debris that could restrict airflow.
- Incorrectly seated filters or dust cup: Confirm that everything is installed properly.
Cleaning the filters will not resolve every suction problem, particularly if a blockage remains elsewhere in the vacuum.
If the vacuum shuts off unexpectedly, overheating is one possible cause. Turn it off, unplug it, check the filters and accessible airflow paths, and allow the machine to cool before restarting.
For the Shark Navigator NV352, the owner’s guide specifies a minimum cooling period of 45 minutes after a thermal shutdown. Other Shark models may specify a different period, so use the instructions for your exact model.
Before I blame the filters, I check the entire accessible airflow path. A clean filter cannot compensate for a packed dust cup or a blockage farther down the hose or wand. If the vacuum still feels weak after cleaning, I work through these checks one at a time rather than assuming the filter itself has failed.
Practical Troubleshooting: What the Symptoms May Mean
1. High-Pitched Whistling After Reassembly
A new whistling sound may indicate that air is passing through a gap or that airflow is restricted.
What I check first:
- Misaligned foam or felt: Check whether the filters sit flat in their compartments.
- Folded filter edge: Look for a corner caught under the housing.
- Loose dust cup or filter cover: Confirm that each part is properly secured.
- Restricted airflow: Inspect the hose or another accessible airflow path for blockages.
Switch off the vacuum before opening the filter compartment. Correct the fit or clear any accessible blockage before testing it again.
My first move is to reseat the filters, not order replacement parts. If the whistle appeared immediately after cleaning, I start with the parts I just handled. I remove and reinstall the filters, check the dust cup connection, and look for a trapped edge. If the noise remains, I inspect accessible airflow paths for a restriction.
A whistle is a clue, not a diagnosis. I do not assume a damaged seal is responsible until the basic fit and blockage checks are complete.
2. The Vacuum Shuts Off Unexpectedly
A thermal-protection shutdown can occur when airflow is restricted and the vacuum overheats. A dirty filter is one possible cause, but a blocked hose, wand, or floor nozzle can cause similar problems.
What to do:
- Switch off and unplug the vacuum.
- Empty the dust cup.
- Check the filters and accessible airflow paths for blockages.
- Allow the machine to cool for the period specified in its owner’s guide.
For the Shark Navigator NV352, allow at least 45 minutes before restarting after a thermal shutdown. Do not repeatedly switch the vacuum on while it is still overheating.
Do not keep restarting a vacuum that shuts itself off. I treat an unexpected shutdown as a reason to stop and inspect the machine, not as a problem to work around by repeatedly pressing the power switch. A clogged filter can restrict airflow, but so can debris in the hose, wand, or floor nozzle.
If the filters were recently washed, I also verify that they are completely dry before the next use. If the vacuum continues to shut down after the accessible blockages have been cleared and the correct cooling period has passed, follow the manufacturer’s troubleshooting guidance rather than repeatedly testing it.
3. A Sour or Musty Smell After Cleaning
A sour or musty smell may indicate that a filter has not dried completely or that dust and residue remain in the vacuum.
Remove the filters and check for residual moisture. If they are damp, continue air-drying them. Inspect the dust cup and accessible airflow paths for trapped debris, and clean those parts according to the model’s instructions.
Do not try to mask the odor with fragrance or essential oils. If the vacuum produces a burning smell, stop using it and investigate the cause before operating it again.
How I distinguish a musty odor from a burning smell:
- Musty, sour, or damp-basement odor: This is more consistent with moisture remaining in a filter or with dust and residue trapped inside the vacuum. I check the thickest part of the foam, inspect the dust cup, and look for damp debris in accessible areas.
- Sharp, acrid, electrical, or burnt-material odor: This is more concerning for an overheating component, motor-related problem, or another electrical or mechanical fault. A brush-roll problem may also produce a burning smell, but the odor alone cannot confirm that the brush-roll motor or its windings have failed.
I pay attention to when the smell appears. If a musty odor develops after washing the filters, incomplete drying is one of the first things I investigate. If a sharp burning odor appears while vacuuming, especially alongside unusual noise, smoke, or repeated shutdowns, I stop using the machine rather than continuing to test it.
Do not assume every burning smell comes from the brush-roll motor. Depending on the model and circumstances, other components or trapped debris may be responsible. Let the machine cool, inspect only the accessible areas permitted by the owner’s guide, and seek qualified service if the smell persists or the cause is unclear.
Common Mistakes to Avoid
- Reinstalling filters too early: The surface can feel dry while moisture remains in the center. Allow the full drying period required for your model.
- Twisting or wringing felt: This can stretch or damage the material. Press it gently between paper towels instead.
- Washing a non-washable HEPA filter: Check the model’s instructions before rinsing a post-motor filter.
- Using detergents or disinfectants: Use water only unless Shark explicitly approves another cleaning method. Product residue may leave a film that holds fine dust against the filter material.
- Installing filters in the wrong order: For the NV352 and NV360, install the felt filter first and the foam filter second.
- Assuming discoloration means failure: Filters can remain stained after cleaning. Check for physical damage and follow the manufacturer’s maintenance instructions rather than judging by color alone.
- Blaming every suction problem on the filters: Inspect the dust cup, hose, wand, inlet, and floor nozzle for blockages as well.
Frequently Asked Questions
Can I wash Shark vacuum filters with water?
Yes, if the filters are designated as washable for your model. Washable foam and felt pre-motor filters can generally be rinsed with water, and certain Shark models also have washable HEPA filters. Use water only unless the manufacturer explicitly says otherwise.
How often should I clean Shark Navigator NV352 and NV360 filters?
For both the NV352 and NV360, clean the pre-motor foam and felt filters every three months under normal use. Clean the post-motor HEPA filter every two years or as needed, following the applicable owner’s guide.
How often should I clean Shark Stratos Cordless IZ400 filters?
Clean the IZ400’s pre-motor filters at least once a month and its post-motor filter at least once a year. Allow washed filters to dry completely before reinstalling them; drying can take up to 48 hours.
Can I use my Shark vacuum while the filters are drying?
No. Do not operate the vacuum with required filters removed or while washed filters are still damp. Wait until the filters are completely dry and correctly installed.
Why does my Shark vacuum still have weak suction after cleaning the filters?
The vacuum may have a blockage elsewhere. Check the dust cup, hose, wand, inlet, and floor nozzle. Also make sure the filters are seated correctly and the dust cup is secure.
Why does my Shark vacuum shut off after a few minutes?
A thermal-protection shutdown may occur if the vacuum overheats, sometimes because airflow is restricted. Switch it off, unplug it, check for blockages, and follow the cooling period in your model’s owner’s guide. For the NV352, the specified minimum is 45 minutes.
How can I tell whether a filter is completely dry?
Check the thickest part of the foam, not just its outer surface. Press it gently between your fingers and look for signs of moisture transfer. If it still feels damp, continue air-drying it. Follow the minimum drying time specified for your model.
Final Takeaway
To clean Shark vacuum filters safely, remove loose dust first, rinse only washable filters, handle felt gently, and let every washed filter dry completely before reinstalling it.
For the Shark Navigator NV352 and NV360, clean the pre-motor foam and felt filters every three months and the post-motor HEPA filter every two years or as needed. For the Stratos Cordless IZ400, clean the pre-motor filters at least monthly and the post-motor filter at least annually.
The rinse is only part of the job. Proper drying, correct filter placement, and checking the rest of the airflow path are what help you avoid preventable maintenance problems. When something feels wrong after cleaning, pay attention to the symptom: a whistle may point to a fit or airflow issue, a musty smell may indicate lingering moisture, and a burning odor is a reason to stop and investigate before using the vacuum again.