
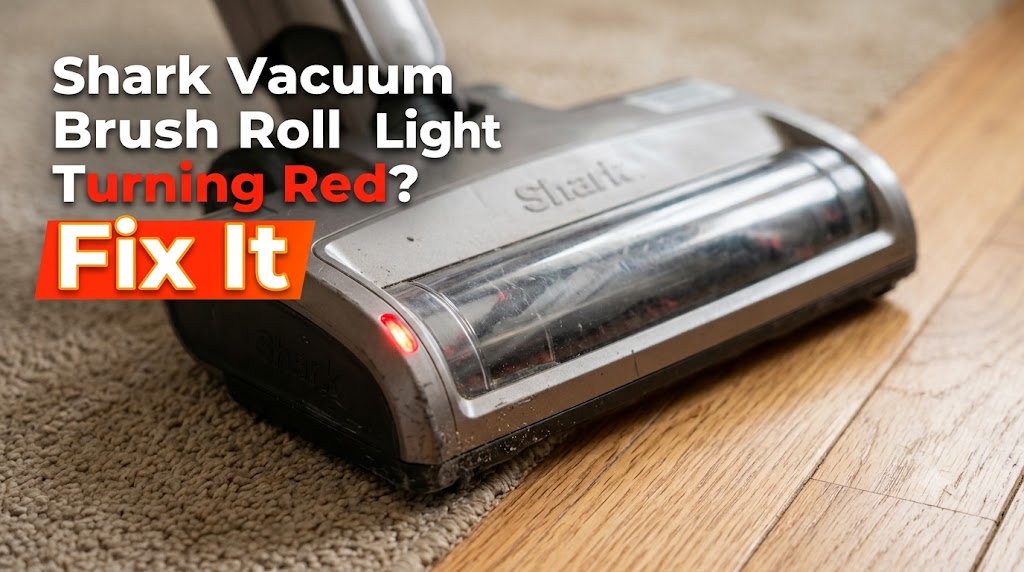
A red brush roll indicator on a Shark vacuum can signal a jammed roller or an overheated motorized floor nozzle, depending on the model and light pattern. I start by identifying the warning, switching off the vacuum, and checking for accessible obstructions before assuming a component has failed.
Quick Lookup: What to Check When the Brush Roll Light Turns Red
These interpretations are not universal Shark error codes. I verify the full model number and its owner’s manual before treating a light pattern as a definitive diagnosis.
A red indicator is a troubleshooting signal, not proof that the brush roll motor has failed. I work through the accessible causes first instead of ordering replacement parts prematurely.
Important: Indicator Lights Vary by Shark Model
The solid-red and flashing-red interpretations in this guide apply to compatible Shark upright vacuums covered by the relevant SharkClean troubleshooting guidance. On those models, solid red can indicate a brush roll jam, while flashing red can indicate an overheated motorized floor nozzle.
Cordless stick vacuums and Shark robot vacuums may use different warning lights, indicator patterns, and troubleshooting procedures. Before diagnosing a red light as a jam or overheating, I check the exact model number and its owner’s manual. If the indicator pattern differs from the examples above, I follow the model-specific instructions rather than assuming the same diagnosis applies.
Step-by-Step: How I Fix a Shark Vacuum Brush Roll Light Turning Red
Step 1: Switch Off the Vacuum and Remove Tangled Hair
I switch off the vacuum and unplug it before touching the brush roll. If the model uses a removable battery, I remove it according to the manufacturer’s instructions.
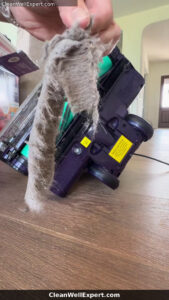
I turn the floorhead over and inspect the roller from end to end. I pay particular attention to the areas beside the end caps, where long hair, pet fur, and carpet fibers can wind tightly around the shaft. Fine strands can press into the narrow gap near an end cap and become difficult to see until I look closely from the side.
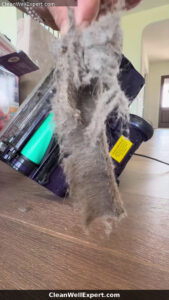
I remove loose hair carefully. If the roller has a designated hair-cutting groove, I guide an appropriate cutting tool along that groove and keep the blade away from the bristles, roller covering, and surrounding plastic. I use this method only when the roller design provides such a groove; I do not drag a blade blindly across the roller or near wiring.
The physical difference is noticeable: loose hair usually lifts away with little resistance, while a dense wrap feels cinched tight around the shaft. I work through the tangle in small sections rather than yanking hard, which could damage the roller or strain its end components.
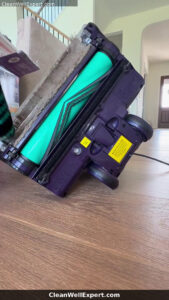
What I check: The accessible roller area should be free of visible hair, string, and debris. If the roller is designed to be removable, I follow the model’s instructions rather than forcing the end caps or housing apart.
Step 2: Check Whether the Brush Roll Is Jammed
With the vacuum disconnected from power, I inspect the roller for anything trapped between it and the floorhead housing.
If the owner’s manual permits manual rotation, I gently turn the roller by hand. A roller that moves smoothly feels different from one that scrapes, catches at the same point, or refuses to turn. I pay attention to whether the resistance is consistent throughout the rotation or concentrated in one spot.
When I feel repeated resistance, I check the roller ends for tightly wrapped fibers. Fine hair and carpet threads can become packed into the narrow area beside an end cap, close to the bearing or shaft support. A small, tight bundle can make the roller feel rough even when most of its surface looks clean.
I never force a roller that remains locked. Resistance can indicate an obstruction, but it does not automatically prove that the motor or bearings have failed.
If the roller remains jammed after accessible debris has been removed, I stop and follow the manufacturer’s troubleshooting procedure.
Verification: The roller should move as intended by its design. If it remains stuck, I do not restart the vacuum in the hope that the motor will push through the obstruction.
Step 3: Clear the Floorhead and Lower Airway
A brush roll can look clean while debris remains trapped in the opening immediately behind it.
I inspect the accessible nozzle opening for compacted dust, paper, plastic, carpet fibers, and other debris. If the manual identifies a lower duct or access panel as user-serviceable, I follow the prescribed procedure to inspect it.
I remove visible obstructions with an appropriate, non-damaging tool. I avoid pushing a rigid object deep into the airway or using a sharp metal hook near wiring.
If the vacuum has also lost suction, I check the dust cup and filters. A clogged airflow path can reduce cleaning performance and may contribute to overheating, although it does not automatically explain every red brush roll warning.
Verification: I confirm that the accessible opening is clear and that every component removed for cleaning has been reinstalled correctly.
Step 4: Check the Upright Lockout and Floor Setting
Before dismantling anything, I check the vacuum’s operating position.
Some Shark upright models disable the brush roll when the handle is locked upright. On these models, the brush roll is intended to operate when the handle is reclined and the correct cleaning mode is selected.
I lower the handle and check the floor setting before testing the vacuum. If the roller starts working normally in the correct position, I have a simpler explanation than a failed brush motor.
This is easy to overlook when moving between rooms. I may park the vacuum upright to move a chair or pick something off the floor, then forget to recline the handle before checking whether the brush roll is running.
The exact behavior depends on the model, so I confirm the correct operating position in the owner’s manual.
Verification: If the model uses upright-position lockout, I check whether the brush roll operates in the prescribed cleaning position. If it remains stationary, I continue troubleshooting.
Step 5: Inspect the Wand, Hose, and Floorhead Connections
If the roller is clear and the vacuum is in the correct operating position, I inspect the connections between the vacuum body, wand, hose, and powered floorhead.
I disconnect power before separating components. I check for visible debris, damaged plastic, loose-fitting parts, and accessible electrical contacts that appear dirty or damaged.
On a Lift-Away model, I make sure the pod and floorhead are seated correctly when I reassemble the vacuum. I align the parts carefully and engage the latches according to the manufacturer’s instructions. A distinct, crisp click can be a useful tactile and audible sign that a latch has engaged, but it is not proof by itself that every internal electrical connection is sound. If the latch does not engage normally, I do not force it.
If the model has accessible electrical contacts between the wand and floorhead, I inspect them visually. I do not scrape the contacts, apply liquid, or attempt electrical repairs while the vacuum is powered.
Verification: The components should be seated correctly, with no visible obstruction or damage at the accessible connections.
Expert Hardware Note: If your brush roll is completely pristine but the light remains a stubborn, solid red, the issue is likely electrical, not mechanical. On Lift-Away models, the heavy pivoting motion at the neck connector can strain internal wiring over time. This wear and tear can cause loose pins or a partial short circuit in the neck joints, tricking the vacuum sensors into signaling a permanent “brush roll jam” even when the roller spins freely by hand.
Step 6: Let the Vacuum Cool if the Light Is Flashing Red
When the applicable SharkClean guide identifies a flashing red brush roll or headlight indicator as an overheated motorized floor nozzle, I switch off the vacuum, unplug it, remove accessible blockages, and allow it to cool for at least 60 minutes before restarting.
I use the cooling period to inspect the accessible nozzle opening and brush roll. I do not repeatedly switch the vacuum on and off to see whether the warning disappears.
I also check the dust cup and filters if suction has dropped. Restricted airflow can affect performance and may contribute to overheating, although a dirty filter does not explain every brush roll warning.
If the model has washable filters, I follow the manufacturer’s cleaning instructions and let them dry completely before reinstalling them. I never reinstall a damp filter or run the vacuum without a required filter.
If the light returns after the prescribed cooling period and the obstruction has been removed, I stop testing and consult the troubleshooting instructions for the exact model.
Verification: I restart only after the vacuum has cooled for the required period, the obstruction has been cleared, and all components are correctly reassembled. If the warning returns, I discontinue use.
Special Considerations for DuoClean, Vertex, PowerFins, and PowerDetect Models
Shark floorheads differ in their roller arrangements and maintenance procedures. I identify the exact model before attempting to remove a roller or open a housing. A removal method that works on one floorhead may damage another.
Traditional DuoClean Models
Some traditional DuoClean floorheads, including designs used on models such as the NV800 and AZ1000, have a removable soft front roller released by a side slide-eject latch. On a model with this design, I use the release mechanism described in its manual, remove the soft roller, clear accumulated debris, and reinstall it as instructed.
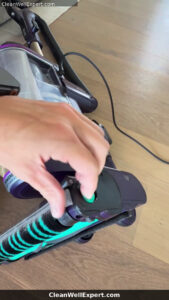
I do not assume the second roller uses the same removal procedure. If the rear roller is not designed for user removal, I leave the housing closed and clean only the areas identified in the manual. I never pry at a cover simply because it appears to be an access panel.
Vertex and PowerFins Models
Vertex and PowerFins floorheads use different brush roll configurations across the product range. Some components are designed for routine cleaning, while others may not be intended for removal.
I inspect the accessible roller ends and housing for wrapped hair. I clear debris using the approved maintenance procedure rather than forcing an end cap or removing a component without instructions.
If the brush roll remains jammed, I consult the exact model’s manual before proceeding. I do not assume every Vertex or PowerFins floorhead has the same removable parts.
PowerDetect Models
PowerDetect upright and cordless vacuums may use different brush roll release mechanisms, so I check the exact model before removing the roller. Unlike some traditional DuoClean floorheads that use a side slide-eject latch for the soft front roller, certain PowerDetect upright floorheads may have a dedicated release button. I follow the owner’s manual to identify the correct release mechanism rather than assuming every PowerDetect model uses the same design.
Before cleaning, I switch off the vacuum and disconnect power according to the manufacturer’s instructions. I release the roller only through its designated latch or access point, then remove accessible hair and debris. When reinstalling it, I align the roller carefully and confirm that it is securely seated as directed in the manual. If the red indicator returns after reassembly, I stop the vacuum and follow the troubleshooting procedure for that specific model rather than assuming the roller is the only possible cause.
When Should I Replace the Brush Roll or Seek Repair?
I consider replacement or professional service when routine cleaning does not restore normal operation.
- Visible roller damage: Cracked components, broken end caps, or badly worn brush material may require replacement.
- Persistent mechanical resistance: The roller remains jammed after accessible debris has been removed.
- Repeated red warning: The indicator returns despite proper cleaning, assembly, and cooling.
- Unusual noises: Grinding, repeated clicking, or other abnormal sounds continue after the obstruction is cleared.
- Burning smell or visible damage: I disconnect the vacuum and stop using it until the cause has been identified.
A burning smell is a serious warning, so I switch off the vacuum, unplug it, and stop using it until I identify the cause. On modern Shark models, including certain Vertex, Stratos, and PowerDetect configurations, the brush roll drive mechanism can use a toothed belt rather than the traditional smooth rubber belt found in older designs. The exact mechanism varies by model and floorhead assembly, so I check the manufacturer’s documentation before drawing conclusions about the drive system. I never assume a burning smell automatically means the belt has failed; a jammed brush roll, an overheated motor, or another electrical or mechanical fault may also be responsible.
Therefore, a burning odor on a modern Shark is almost never a snapped belt; instead, it usually signals an electrical overload from a seized motor bearing, or friction heat generated by a severe blockage. Do not run the vacuum to “test” the smell, as this can permanently fry the internal circuitry.
How I Prevent the Red Brush Roll Light From Returning
I focus on four maintenance habits that address common causes of brush roll trouble.
Remove wrapped hair regularly. I inspect the roller ends after cleaning areas with heavy hair or pet-fur buildup.
Check the floorhead opening. I remove visible debris before it becomes compacted around the roller or lower airway.
Maintain the filters correctly. I empty the dust cup when needed and clean or replace filters according to the model’s instructions. I allow washable filters to dry completely before reinstalling them.
Stop when a warning persists. I do not repeatedly restart a brush roll that remains jammed, overheats, or makes unusual noises.
These habits help me catch common problems early, but they cannot eliminate every possible mechanical or electrical failure.
Final Verdict
When my Shark vacuum brush roll indicator turns red, I start by identifying the light pattern and checking for tangled hair or debris. If the applicable model guide identifies flashing red as an overheating warning, I follow the prescribed cooling procedure before restarting.
I also check the vacuum’s operating position, floorhead connections, and accessible airflow passages. When cleaning the roller, I pay close attention to tightly wrapped fibers near the end caps and use only the removal method intended for that floorhead.
The key is to match the troubleshooting procedure to the exact Shark model. Traditional DuoClean, PowerDetect, Vertex, and PowerFins floorheads do not necessarily share the same roller-release mechanism. I do not replace a brush roll, force a jammed mechanism, or assume every red light has the same cause without checking the manufacturer’s instructions first.