
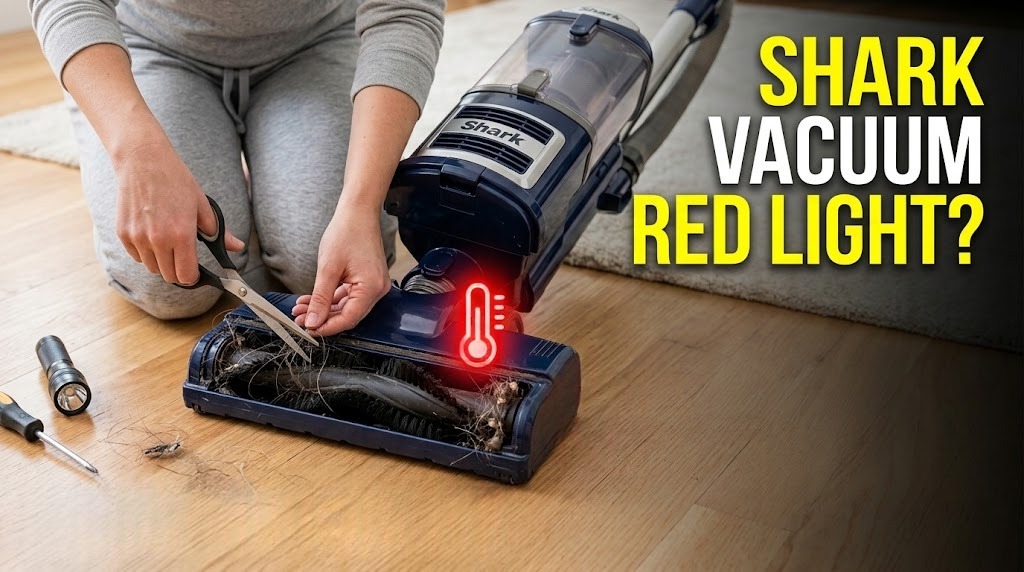
A solid red brush roll light on a Shark vacuum usually signals a brush roll jam or safety shutdown—not necessarily a burned-out motor. Turn off and unplug the vacuum, then check for tangled hair, debris around both roller end caps, and a loose floorhead connection. If the light is flashing, let the machine cool before testing it again. On models with a recline interlock, also lower the handle to make sure the brush roll can engage.
Quick Diagnosis: What Does Your Shark Brush Roll Light Mean?
Important: Indicator behavior varies across Shark models. On some classic Navigator/Rotator models, a flashing red brush roll light can indicate that the motorized floorhead has overheated. DuoClean and PowerFins models may use different indicator arrangements, including separate indicators for different rollers. Do not assume that every flashing red light means the same thing; check the owner’s manual for your exact model.
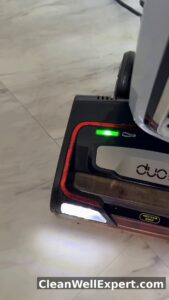
Step-by-Step: How to Fix a Shark Vacuum Brush Roll That Is Not Spinning
Step 1: Switch Off and Unplug the Vacuum
Before touching the brush roll, I switch off the vacuum and unplug it from the outlet. If the model uses a removable battery, I remove it according to the manufacturer’s instructions.
I never pull tangled hair from a powered brush roll. Even if the roller has stopped, the motor could activate again when the obstruction clears or the machine restarts.
If the vacuum smells burnt, makes a grinding noise, or repeatedly shuts down, I stop using it until the cause has been identified.
Step 2: Remove the Floorhead Cover and Inspect the Brush Roll
I place the vacuum on a stable surface and detach the floorhead or other components as instructed in the owner’s manual.
With the floorhead turned over, I look for hair wrapped around the brush roll, compacted lint, string caught underneath the roller, and debris lodged in the nozzle opening.
The cover-release mechanism varies by model. Some Shark vacuums use locking tabs, while others have different access arrangements. I follow the correct procedure rather than forcing a latch or prying open the housing.
If the roller is removable, I take it out only as directed by the manual. This gives me a clearer view of the roller ends, where tightly wound hair can be difficult to see from above.
Step 3: Remove Hair and Check Both Ends of the Brush Roll
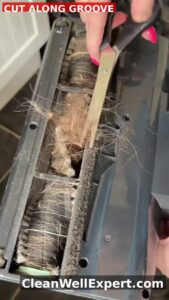
Hair and pet fur do not always cause an obvious jam in the middle of the roller. The harder-to-spot problem is often a tight ring of hair wound underneath an end cap, where it can press into the narrow gap around the bearing area. That hidden buildup can increase friction and, if the roller keeps running while jammed, contribute to heat damage around the plastic edge.
I use scissors carefully to cut away visible hair, following the designated cutting groove if the roller has one. I keep the blades away from the bristles, rubber fins, seals, and plastic housing.
I then inspect both ends rather than assuming the brush roll is clear because the center looks clean.
Pay particular attention to the roller ends. A compacted ring of hair can create enough resistance to prevent the brush roll from turning freely. Pulling at the loose strands without removing the tightly wound material may leave the underlying problem untouched.
With the vacuum unplugged and the roller safely accessible, I gently turn the brush roll by hand if the design permits it. I pay attention to the feel: it should move smoothly, without stiff spots or a gritty, step-by-step resistance. If it feels unusually heavy, catches repeatedly, or produces a dry scraping or grinding sound, I suspect that debris remains around the end cap or bearing area.
I do not force the roller to turn. If it remains stiff after visible hair has been removed, the bearing or roller assembly may be damaged and require further inspection or replacement.
Step 4: Check the Drive Mechanism Without Opening the Motor Housing
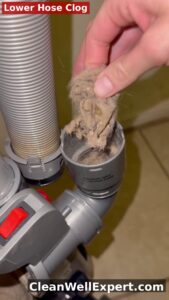
I do not pry open the motor housing or gearbox, and I do not treat internal belt replacement as a routine do-it-yourself repair. Many Shark floorheads use enclosed drive mechanisms, and their construction and serviceability vary by model. An internal drive fault cannot be confirmed simply by looking at the indicator light.
If the brush roll remains inactive after the accessible checks below, I consult the model-specific service guidance or contact Shark support. If the internal drive mechanism is not user-serviceable and the nozzle assembly is identified as the replaceable service part, the appropriate repair may be to replace the complete floor nozzle rather than dismantle the gearbox.
Instead, I check the components that are accessible to the user:
- Brush roll: Look for tangled hair, damaged bristles, worn rubber fins, or cracked end caps.
- Roller seating: Confirm that the brush roll is installed correctly and sits evenly in its supports.
- Floorhead opening: Remove accessible debris that could prevent the roller from turning.
- Electrical connections: Check that the floorhead and wand are correctly connected.
- Visible damage: Stop using the vacuum if the floorhead housing, wiring, or connectors appear damaged.
If the brush roll remains jammed or inactive after these checks, the problem may involve the internal drive assembly, motor, wiring, or control electronics. At that point, I consult the model’s service guidance or contact Shark support rather than dismantling the motor housing.
Step 5: Check the Electrical Connections and Reassemble the Floorhead
On Shark Lift-Away models with a powered floorhead, I check the connections between the vacuum body, wand, and nozzle before moving on to a power test. A loose connection can leave the vacuum pulling air normally while the brush roll refuses to spin.
First, I switch off the vacuum, unplug it, or remove the battery if the model uses one. Following the owner’s manual, I disconnect the wand and floorhead and inspect the accessible metal contact pins and matching sockets. I look for packed carpet lint, fine dust, visible corrosion, bent pins, or anything that might prevent the parts from fitting together properly. These small details are easy to overlook, especially when the connection looks fine from the outside.
If I find loose debris, I gently wipe it away with a clean, dry microfiber cloth. I avoid scraping the contacts with metal tools or spraying liquid cleaner into the connectors. If a pin looks bent or damaged, I leave it alone rather than trying to force it back into place.
Once the connections look clean, I reinstall the brush roll if I removed it, making sure both ends sit properly in their supports. I then secure the soleplate or access cover, checking that the locking tabs are fully engaged. Finally, I reconnect the floorhead to the wand and push the parts together firmly until the connection feels secure. If that model has a locking catch, I check that it engages as intended rather than relying on a click alone.
Before restoring power, I give the assembled floorhead a quick visual check. The cover should sit flush, the roller should be seated correctly, and the wand connection should not feel loose. If anything refuses to fit, I stop and check the assembly instructions instead of forcing it.
Step 6: Power On and Check the Handle Position
A brush roll that refuses to spin is not necessarily broken. On some Shark upright vacuums, the brush roll will not engage while the handle is locked in the upright position. The exact operating sequence varies by model, so I check the controls and handle position before suspecting an internal fault.
To test the vacuum, I follow this sequence:
- Make sure the floorhead is fully assembled and securely connected.
- Plug the vacuum into the outlet or reinstall its charged battery, depending on the model.
- Select the appropriate brush roll or carpet setting if the vacuum has one.
- Place the floorhead flat on the floor, then recline the handle into the normal cleaning position.
- Check whether the brush roll starts spinning and whether the indicator light returns to its normal operating state.
I pay attention to what happens when I recline the handle rather than assuming every Shark vacuum uses the same switch or indicator sequence. Some models use different controls, and the light’s meaning depends on the specific vacuum.
If the brush roll starts spinning normally, the problem may have been a loose connection, incorrect assembly, or handle position. If the light remains red, the roller stays still, or the vacuum shuts down again, I switch it off and disconnect the power before continuing. At that point, I recheck for a remaining obstruction and consult the model-specific troubleshooting guidance. A persistent fault can indicate a problem with the drive mechanism, motor, wiring, or thermal protection system, but the indicator light alone cannot identify which component has failed.
Why Is My Shark Brush Roll Light Still Red or Flashing After Cleaning?
If the brush roll is clean but the warning remains, I investigate the underlying cause rather than repeating the same cleaning steps.
1. The Brush Roll May Still Be Jammed
Hair can remain hidden behind an end cap or inside a narrow gap even when the visible roller looks clean.
I inspect both ends again and check whether the roller turns smoothly when it is safely accessible. A roller that feels stiff, catches, or makes a scraping sound may still have trapped debris or a damaged bearing.
If removing accessible hair does not restore free movement, I stop forcing the roller. The brush roll or its supporting assembly may need service or replacement.
2. The Motor May Need Time to Cool
A jammed brush roll or restricted airflow can trigger a protective shutdown on supported Shark models. If the vacuum stops after an obstruction or begins flashing a red brush roll indicator, switch it off, unplug it, and remove any visible debris before checking for other blockages.
Allow the Vacuum to Cool for at Least 60 Minutes
For models whose Shark support instructions specify a thermal reset, allow the vacuum to cool for at least 60 minutes before restarting it. While it cools, empty the dust cup and inspect the hose, wand, handle, vacuum body, and floor nozzle for blockages. Restricted airflow can contribute to overheating, so clearing hair from the brush roll alone may not resolve the issue. Follow the troubleshooting instructions for your specific model.
3. The Floorhead or Wand Connection May Be Loose
A loose connection can affect the powered floorhead even when the vacuum body still produces suction.
I switch off and unplug the vacuum, separate the relevant components, and check that the connections are clean, undamaged, and correctly seated. On supported Lift-Away models, I also inspect the accessible metal contacts for debris or damage.
If reconnecting the components does not restore brush roll operation, I do not assume the connection is the only problem. The fault could be inside the floorhead, wiring, switches, or control electronics.
4. The Brush Roll May Be Installed Incorrectly
If the problem started immediately after cleaning, I check the roller installation first.
The brush roll must sit correctly in its supports, and any removable cover or retaining mechanism must be secured as directed. A roller that is not fully seated may bind or fail to engage properly.
I do not force the roller into position. If the parts do not fit together as expected, I check the instructions for the exact model.
5. A Damaged Motor or Control Component May Be Responsible
If the brush roll is free of debris, correctly installed, and connected properly but still does not operate, an internal fault becomes more likely.
Possible causes include a failed brush roll motor, damaged wiring, a faulty switch, or a control-board problem. These faults cannot be reliably diagnosed from the indicator light alone.
If the vacuum repeatedly shuts down, produces a burning smell, or makes unusual mechanical noises, I stop using it. I then consult Shark’s model-specific support guidance or arrange a repair rather than opening the motor housing.
Can You Wash a Shark Vacuum Brush Roll?
The answer depends on the roller and the instructions for the exact model. I do not treat every Shark roller as washable.
Main Bristle Brush and PowerFins Rollers
I clean the main bristle brush or PowerFins roller by removing hair, string, and debris according to the owner’s manual. I do not soak the main roller or rinse it under a tap unless the manufacturer explicitly identifies that exact component as washable. The soft roller’s wash instructions do not apply to the main bristle or PowerFins roller.
Water can reach bearings or other components that are not designed for immersion, potentially causing corrosion or damage. A powered brush roll should not be treated like an ordinary washable cleaning accessory.
Soft Front Rollers
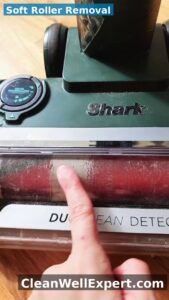
Some DuoClean floorheads have a removable soft front roller that the manufacturer permits users to wash.
If the manual for my exact model confirms that the soft roller is washable, I remove it using the specified release mechanism and rinse it with cold water as instructed. I allow it to air-dry completely before reinstalling it; this may take 24–48 hours, depending on the roller and conditions.
Never reinstall a damp roller. Do not rinse the powered floorhead, motor, electrical contacts, or any component that the manufacturer has not specifically designated as washable.
The important distinction is between a washable soft roller and the complete powered brush roll assembly. Permission to wash one component does not mean the entire floorhead can be exposed to water.
When Should You Replace the Brush Roll or Floorhead?
Cleaning can resolve a jam caused by hair and debris, but it cannot restore a cracked roller, worn bearing, or failed motor.