
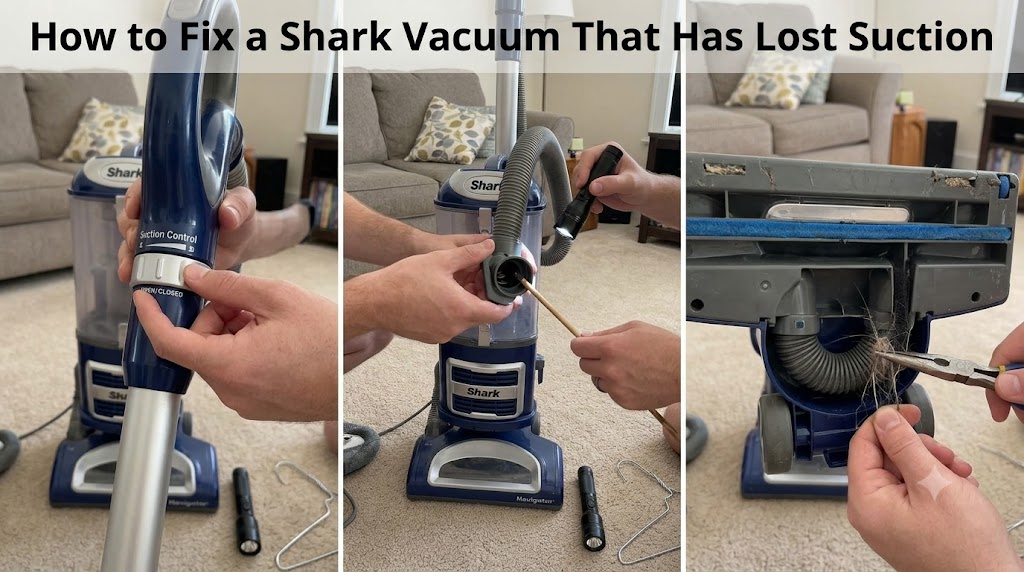
If your Shark vacuum has lost suction, check the dust cup, filters, hose, floor nozzle, and seals before assuming the motor has failed. A clogged filter, blocked airway, or leaking connection can reduce pickup even while the motor is running normally. These seven checks help narrow down the cause before you spend money on replacement parts.
Shark upright, cordless, handheld, and robot vacuums do not all use the same filters, brushrolls, sensors, or airflow paths. Before removing parts, identify your model number and check its owner’s guide.
Switch off and unplug a corded vacuum before inspecting it. Remove the battery from a cordless model if the design allows it. Never reach into a powered brushroll or open a sealed electrical or cyclone assembly.
Quick Diagnostic Guide
| Symptom | Component to Check First | Recommended Action |
|---|---|---|
| Weak suction across all surfaces | Dust cup, filters, hose, and seals | Empty the cup and inspect the airflow path |
| Strong airflow at the hose but poor floor pickup | Floor nozzle, lower nozzle neck, and brushroll | Check for blockages and brushroll problems |
| Suction improves when an attachment is removed | Attachment, wand, or connection | Inspect the removed section |
| Suction drops after several minutes | Filters, airflow restrictions, or overheating | Check for clogs and follow the model’s cooldown instructions |
| Whistling or unusual high-pitched noise | Hose, seals, connections, or restricted airflow | Inspect for leaks and blockages |
| Suction changes when the hose moves | Stretch hose and connection collars | Look for cracks, loose fittings, or damaged seals |
| Robot or cordless vacuum fails to empty into its dock | Dustbin, dock intake, bag, and air passages | Check the bin and dock according to the manual |
| Vacuum shuts off during use | Blockage, overheating, or electrical fault | Switch it off and inspect the airflow path before restarting |
1. Empty the Dust Cup and Check Its Seals
A full dust cup can restrict airflow, and a cup that is not seated correctly can allow air to bypass the intended path. Emptying it is one of the quickest ways to rule out a basic problem.
Remove the dust cup according to your model’s instructions. Empty it, then inspect the inlet, internal screen, and accessible areas where lint or hair may have collected. Fine dust can cling to the screen even when the cup does not look full.
Check the cup’s sealing surfaces, connection points, and any accessible gaskets for visible damage. If the design uses an O-ring seal, look for cracks, flattening, displacement, or wear. Not every Shark model uses the same sealing arrangement, so do not assume a missing or different-looking seal is a fault without checking the parts diagram.
Reinstall the cup and make sure it locks securely into place.
How to Verify the Fix
Run the vacuum briefly and compare airflow at an accessible hose or wand opening. Hold your hand near the opening without sealing it with your palm. A noticeable improvement after emptying and reseating the cup suggests that a full bin or poor connection may have contributed to the problem.
If airflow remains weak, move on to the filters rather than repeatedly emptying the cup.
2. Clean the Filters and Identify the Correct Filter Type
Dirty filters can restrict airflow enough to make a Shark vacuum sound as though it is running normally while picking up less debris. However, filter maintenance differs across upright, cordless, handheld, and robot models.
Foam-and-felt pre-motor filters
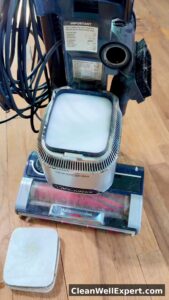
Many Shark upright vacuums use a foam-and-felt pre-motor filter assembly. These filters provide separate filtration stages before air reaches the motor. Remove them according to the owner’s guide and inspect the foam for embedded dust and the felt for fine particulate buildup.
Wash only filters that the manufacturer identifies as washable. Where washing is permitted, use water only unless the instructions specifically state otherwise. Do not use soap, twist the filter aggressively, or reinstall it while damp.
Shark’s general upright-vacuum guidance recommends allowing washed filters to dry for 24 hours before reinstalling them. Follow the instructions for your exact model if they specify different requirements.
On models with separate foam and felt filters, the correct order and orientation matter. Do not assume every Shark vacuum uses the same arrangement.
HEPA and post-motor filters
Inspect the HEPA or post-motor filter separately. Do not assume it can be washed just because the pre-motor filters can. Some models have different maintenance requirements for each filter.
Follow the owner’s guide for cleaning, replacement, and drying. Avoid brushing delicate filter media aggressively or forcing debris deeper into the pleats.
Cartridge-style filters on older or handheld models
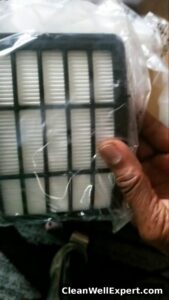
Some vacuums use cartridge-style filters rather than the familiar foam-and-felt arrangement. Do not assume a cartridge filter is washable or washable-proof based on its appearance alone. The material and construction vary.
If the owner’s guide says the filter must remain dry, do not rinse it. Use only the cleaning method approved for that filter. Do not automatically use compressed air: high-pressure airflow can damage filter media or disperse fine dust into the air. Replace a damaged or non-serviceable filter as directed by the manufacturer.
How to Verify the Fix
Reinstall the filters only when they are clean, dry where applicable, and correctly seated. Close the covers securely and run the vacuum briefly.
Compare the airflow with what you noticed before cleaning. If airflow improves, filter restriction may have contributed to the problem. If the filters were already clean and correctly installed, inspect the hose and wand next.
Never operate the vacuum without a required filter installed just to test whether suction improves.
3. Inspect the Hose, Wand, and Lower Nozzle Neck
A blockage can sit out of sight inside the hose, wand, or narrow passage connecting the floor nozzle to the rest of the vacuum. Hair, lint, paper, and compacted dust can catch at bends and joints.
Switch off the vacuum and disconnect the relevant components as directed in the owner’s guide. Shine a flashlight through both ends of the hose and wand. Looking through the passage from different angles can reveal debris that is difficult to see straight on.
Check the lower nozzle neck and floor-nozzle airway, too. Debris can collect where the floor nozzle joins the wand, particularly around narrow bends. Remove only accessible obstructions with a soft, non-sharp tool where appropriate. Avoid forcing debris farther into the passage.
How to Verify the Fix
With the parts reassembled correctly, compare airflow at an accessible opening. If airflow improves after clearing one section, you have likely found at least part of the restriction.
If airflow feels strong at the hose but floor pickup remains poor, focus on the nozzle airway and brushroll rather than assuming the main motor is weak.
Do not drop coins, marbles, or other objects into the hose as a blockage test. They can lodge in bends and create a new obstruction.
4. Check the Suction Control, Cleaning Mode, and Sensors
Not every Shark vacuum uses the same suction controls. Some upright models have a mechanical suction-release collar, while many cordless models use electronic power settings or automatic floor adjustment.
Mechanical suction control
If your vacuum has a suction-release collar, check whether it has been left open. On compatible models, opening the collar reduces suction at the floor head, which can make the vacuum easier to push on certain rugs.
Electronic power modes and automatic adjustment
On models with electronic settings, select the appropriate mode for the floor type. Check the owner’s guide to understand how the selected mode affects suction and brushroll operation.
Some newer Shark vacuums use technologies marketed under names such as Clean Sense IQ or Smart Detect. These features are model-specific and do not all operate in the same way. A change in motor speed may be part of normal automatic adjustment rather than evidence of a blockage or failure.
If the owner’s guide identifies a user-accessible dirt sensor that needs cleaning, follow its instructions. Use a soft, dry cloth only when the manual recommends that method. Do not assume every sensor is located inside the dust cup, and do not dismantle the vacuum to search for hidden sensors.
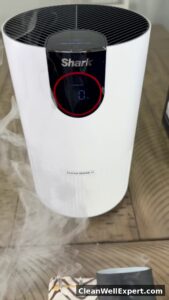
A dirty sensor should not automatically be diagnosed as the cause of weak suction. Check the selected mode, filters, and airflow path as well.
How to Verify the Fix
Test the vacuum on a small area of hard flooring and, if appropriate, a carpet. Check whether the selected mode is correct and whether pickup improves.
If the vacuum has automatic adjustment, compare its behavior under the conditions described in the owner’s guide. If suction remains weak across different settings, continue checking for a blockage, leak, or filter restriction.
5. Check the Stretch Hose for Cracks and Air Leaks
A split hose or damaged connection can let air escape before it reaches the intended suction path. Small cracks may be difficult to spot because the hose is corrugated and stretches during normal use.
Inspect the hose from end to end, paying particular attention to the spaces between the ridges, hose cuffs, connection collars, and sections that bend frequently. Look for fine splits, separated seams, loose fittings, and damaged seals.
Inspect the connection points for worn sealing surfaces or gaskets. Some assemblies use O-ring seals, but the design varies across Shark models. If your model has an O-ring or replaceable gasket, check for flattening, cracks, displacement, or visible damage. Do not add lubricant or install a generic replacement seal unless the manufacturer confirms compatibility.
A whistle or high-pitched hiss near a hose joint can suggest an air leak. However, sound alone does not prove that a leak is present. A restriction elsewhere in the airflow path can also change the motor’s pitch.
How to Verify the Fix
Run the vacuum briefly and listen around accessible hose connections. Move the hose gently through its normal range without sharply bending or stretching it. If airflow changes noticeably as the hose moves, inspect that section closely for cracks or a loose fitting.
You can compare airflow before and after reseating a connection. Keep your hand near the opening rather than sealing it.
If you find a split in the hose, replacing it with a compatible part is generally more reliable than using tape as a permanent repair.
6. Inspect the Cyclone Assembly, Brushroll, and Dock Connections
If the dust cup and filters are clear but pickup is still poor, inspect the remaining accessible airflow path. Dust can accumulate around the cyclone assembly, cyclone cone, and cyclone screen, while hair or debris can obstruct the floor nozzle.
Cyclone assembly and dust passages
Empty the dust cup and inspect the cyclone area according to the owner’s guide. Fine dust may collect around accessible passages and contribute to restricted airflow, depending on the model’s design.
Do not pry open a sealed cyclone assembly or dismantle internal components unless the manufacturer’s service instructions explicitly allow it. A sealed or non-serviceable assembly should be handled according to the manufacturer’s guidance, not cleaned by forcing compressed air into it.
Brushroll and self-cleaning technology
At the floor nozzle, switch off and unplug the vacuum before checking the brushroll. Remove wrapped hair and fibers according to the model’s instructions. Check the nozzle airway and the connection between the nozzle and wand for compacted debris.
Some Shark models use Zero-M or other self-cleaning brushroll designs intended to reduce hair wrap. Self-cleaning does not mean the brushroll can never become obstructed. Long hair, fibers, tape, or a larger foreign object can still interfere with rotation or pickup.
Inspect the brushroll and any user-accessible areas around it. Do not assume every self-cleaning design uses the same mechanical comb or row of plastic teeth. If the owner’s guide shows a comb-like mechanism, check that area for trapped debris without forcing or bending the parts.
A brushroll problem is not always a suction problem. A jammed or non-spinning brushroll can reduce debris pickup on carpet even when airflow through the hose remains strong. Indicator lights and their meanings vary by model, so consult the relevant owner’s guide.
Cordless vacuums and robot vacuums with auto-empty docks
If you use a cordless vacuum with an auto-empty dock or a Shark robot with a self-empty base, check both the vacuum and the dock. These systems have additional components that can affect debris transfer.
- Empty the vacuum’s dustbin if it is full.
- Check the dock’s dust bag or debris container and replace or empty it as directed.
- Inspect the accessible intake openings and air passages on the vacuum and dock for visible blockages.
- Make sure the vacuum is seated correctly on the dock and that accessible connections are clear.
- Check the owner’s guide for any model-specific dock maintenance steps.
A full dock bag or blocked intake can prevent effective emptying, leaving debris in the vacuum’s bin. That is not necessarily the same fault as weak suction while the vacuum is cleaning. Do not assume every dock uses the same airflow route, and do not dismantle a sealed dock or use compressed air unless the manufacturer explicitly recommends it.
How to Verify the Fix
Reconnect each component securely and check that the latches engage. Compare airflow at the hose with pickup at the floor nozzle.
If airflow at the hose is strong but the nozzle still pushes debris around, inspect the brushroll and nozzle airway. If the vacuum cleans normally but fails to empty into its dock, focus on the dustbin, dock bag, intake, and docking position.
Keep fingers, loose clothing, and tools away from a powered brushroll. Never test the brushroll with protective components removed unless the manufacturer explicitly instructs you to do so.
7. Check for Overheating Before Restarting the Vacuum
A Shark vacuum that loses suction and then shuts off may have restricted airflow or may be overheating. A clogged filter, full dust cup, or blocked hose can contribute to this problem. Repeated shutdowns can also indicate a fault that should not be treated as a simple clog.
Shark states that many of its vacuums have a motor-protective thermostat that automatically shuts the unit off if it overheats. For those models, its general upright-vacuum guidance recommends waiting 60 minutes for the vacuum to cool while checking the hose, wand, pod, dust cup, handle, and nozzle for blockages. Follow the instructions for your exact model. <Cite refs={[“turn430393search0”]} />
Older models and thermal protection
Do not assume every Shark vacuum uses the same thermal protection mechanism. Some models may use a motor-protective thermostat or thermal cutout, but the exact design depends on the product.
If an older vacuum suddenly loses suction, becomes unusually hot, or develops a sharp, strained motor sound, switch it off manually and unplug it. Do not wait for an automatic shutdown. A lack of automatic shutdown does not prove that the motor is safe to keep running.
Never bypass a thermal protector or attempt to repair internal electrical components without appropriate service instructions.
How to Verify the Fix
After clearing any obstruction and allowing the vacuum to cool for the period specified in its instructions, reassemble it and make a brief test. Check whether it runs steadily and maintains normal pickup.
If it shuts off again, smells burnt, produces smoke, or makes an abnormal grinding sound, switch it off and stop testing. A persistent problem may require professional inspection rather than another restart.
A reset or cooldown alone will not solve a blockage or a failing component.
When to Repair or Replace a Component
| Finding | Recommended Next Step |
|---|---|
| Dust cup is full or incorrectly seated | Empty it and reinstall it correctly |
| Washable filters are dirty | Clean them as directed and let them dry completely |
| Cartridge filter is damaged or its condition is uncertain | Check the model’s instructions and replace it if required |
| Hose or seal is visibly cracked | Replace the damaged component with a compatible part |
| Hose airflow is strong but floor pickup is weak | Inspect the floor nozzle, brushroll, and lower nozzle neck |
| Cordless vacuum will not empty into its dock | Check the bin, dock bag, intake, and docking position |
| Suction remains weak after basic checks | Consult the model’s troubleshooting guide or arrange service |
| Vacuum repeatedly overheats or shuts off | Stop repeated testing and investigate the underlying cause |
| Burning smell, smoke, grinding, or electrical damage | Stop using the vacuum and seek appropriate service |
Before buying a replacement part, confirm the full model number on the vacuum’s rating label. Shark components that look similar are not necessarily interchangeable.
Frequently Asked Questions
Why is my Shark vacuum running but not picking up dirt?
Start by emptying the dust cup and checking the filters, hose, wand, and floor nozzle. If airflow feels strong at the hose but floor pickup is poor, inspect the nozzle airway and brushroll. If airflow is weak throughout the system, look for a restriction, damaged seal, or air leak.
Can I wash every Shark vacuum filter?
No. Filter materials and maintenance requirements vary by model. Wash only filters identified as washable in the owner’s guide. If your vacuum uses a cartridge-style filter, check its instructions before applying water or compressed air.
Can a dirty sensor cause weak suction on a newer Shark vacuum?
Some models use sensors to detect dirt or adjust cleaning performance, but sensor locations and functions differ. Clean a sensor only if the owner’s guide identifies it and explains how to maintain it. Do not assume a dirty sensor is the cause of weak suction without checking the airflow path.
Can a self-cleaning brushroll still get blocked?
Yes. Self-cleaning brushrolls are designed to reduce hair wrap, not eliminate every possible obstruction. Hair, fibers, tape, and foreign objects can still interfere with rotation or pickup. Switch off the vacuum and follow the model’s instructions before removing debris.
Why does my Shark robot or cordless vacuum fail to empty into its dock?
A full dock bag, a full vacuum bin, a blocked accessible intake, or incorrect docking can prevent effective debris transfer. Check the vacuum and dock separately. A failure to empty into the dock does not automatically mean the vacuum has lost suction while cleaning.
How long should I let an overheated Shark vacuum cool?
Shark’s general upright-vacuum guidance recommends 60 minutes for models with the applicable motor-protective thermostat. Check your model’s instructions and clear obstructions before restarting. If the vacuum repeatedly shuts off, smells burnt, or makes unusual noises, stop using it.
Can a cracked hose cause weak suction?
Yes. A crack or loose connection can allow air to escape and reduce effective suction. Inspect the hose ridges, ends, and connection collars. Replace a damaged hose with a compatible part rather than relying on tape as a permanent repair.
Final Verdict
When a Shark vacuum loses suction, start with the dust cup and filters, then inspect the hose, wand, lower nozzle neck, seals, and floor head. Compare airflow at accessible openings and listen for unusual whistling, but treat these clues as diagnostic hints rather than proof of a particular fault.
If the hose has strong airflow but the floor head performs poorly, focus on the nozzle airway and brushroll. If airflow is weak throughout the system, check for restrictions and leaks before assuming the motor has failed. For cordless and robot models, check the dustbin and auto-empty dock separately when debris transfer is the problem.
The best first fix is the one that addresses the actual restriction or damaged connection—not replacing parts based on guesswork.